Today is going to be the first tutorial on my blog. I’m so
excited and I hope to do more in the future. There were some things that I have
learned as a result of my first ever nail tutorial and hopefully I’ll do another
one that shows improvement.
This blog is all mine, I take the pictures, design the
layout, and paint my own nails. I came across a problem when I had to take
pictures with one hand shown and another holding the various tools. That said I
had to create a very odd contraption that would allow me to take pictures
without using my hands. If only you could see behind the camera; tape and
string scattered all around. To take the picture I had to use my mouth. I know
that sounds very strange but since my camera is the iPhone, the touch screen
was convenient and I could just tap the capture button with my mouth. That all
said, this nail tutorial took a lot of effort, but I think it was worth it.
Everything came out decent and for my first ever nail tutorial I think I did
pretty well. Like I said, I hope to do another one and the quality of
everything improves. Anyways, since this is a nail tutorial, I think I should
actually go onto how to achieve this look.

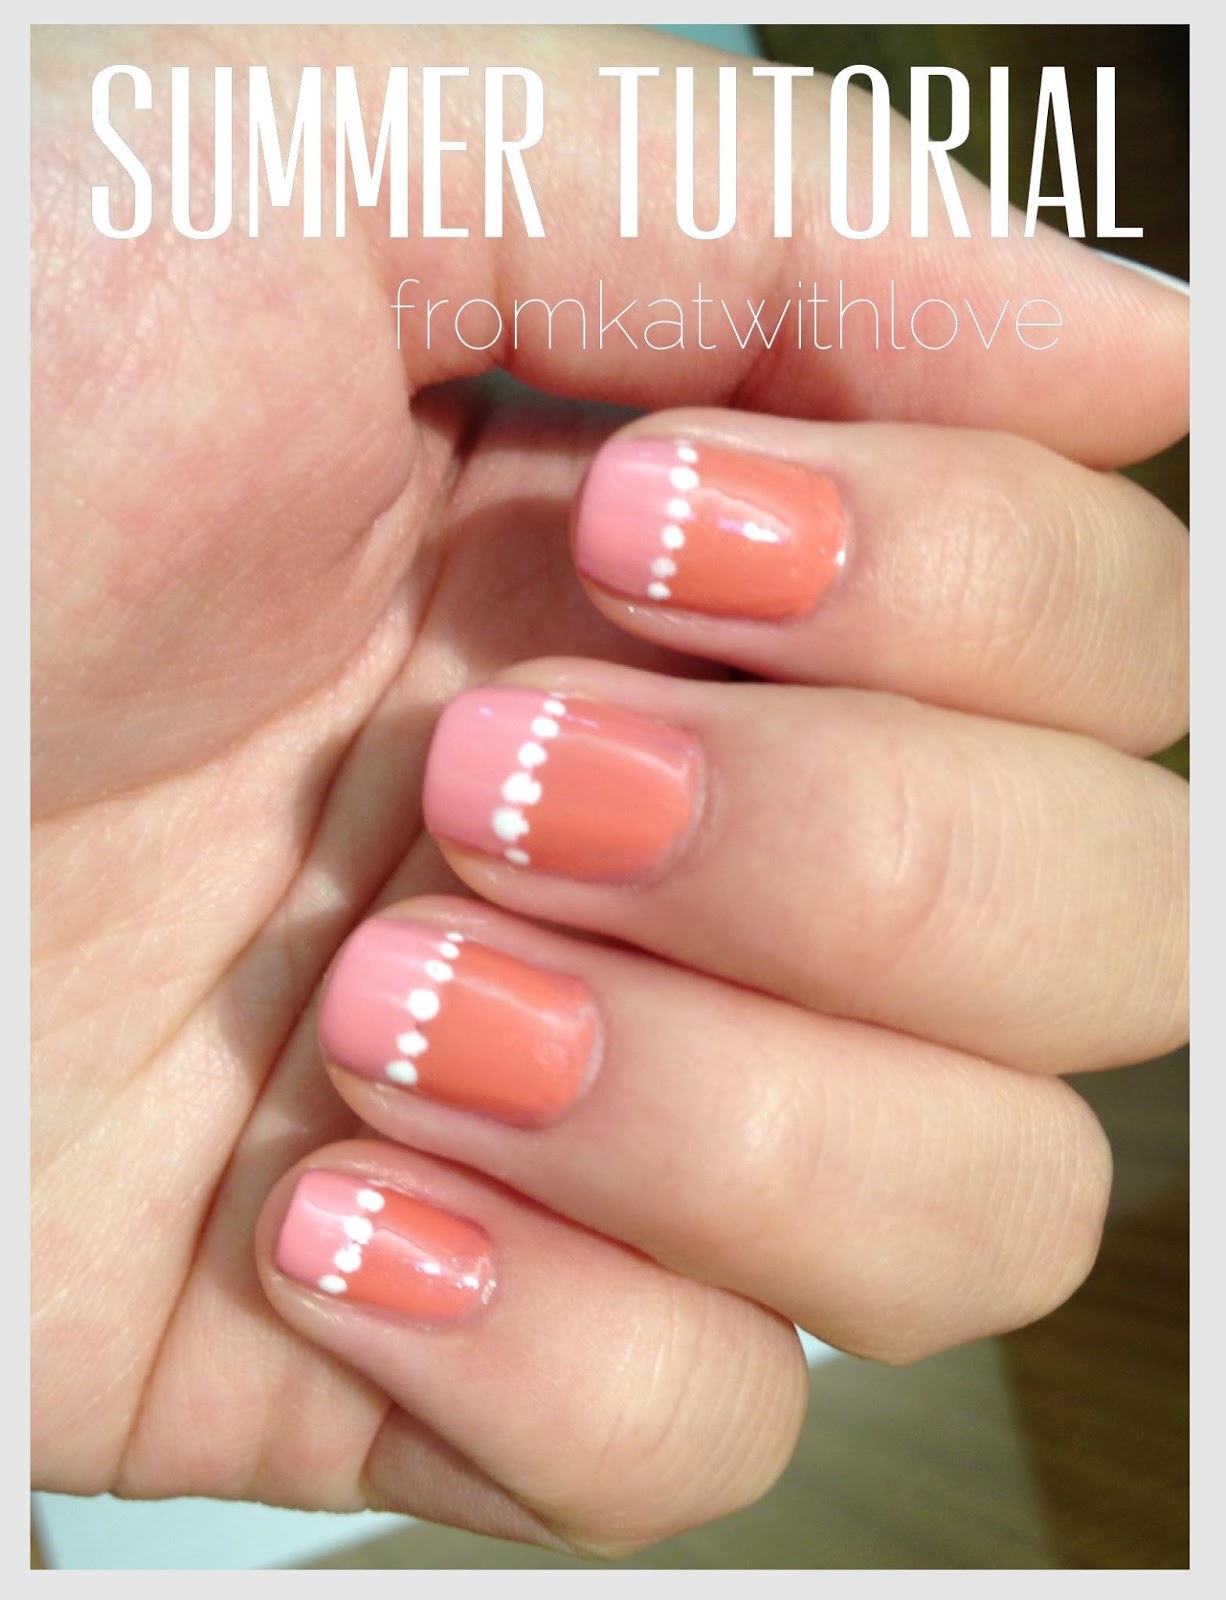
- Apply base coat
- Using one of your main colors apply to the entire nail – Let it dry completely
- Take a strip of scotch tape and align it a little lower than half the nail – You are free to change it up and go higher or lower than I did. I would advise you to set the tape parallel to the tips of your nail instead of the nail bed otherwise you run the risk of the dotted lines being in all different directions. *** Before you put the tape directly on the nail, I would suggest you first stick it to cloth like a t-shirt. If the tape is too sticky it could take off some of your main nail polish in the tape removal***
- Using your second color, apply an even coat from the tape to the tips of the nail. – Let it dry. For this nail polish I found that 20 minutes was a good time.
- Remove the tape
- With a toothpick and the accent nail color dot a line between the two colors
- After letting the nails dry, seal everything with the top coat of your choice.
- Don’t remove the tape too early. When drying, the nail polish becomes tacky and wants to stick to the tape resulting in a messy line.
- When dotting the line, after every couple of dots wipe off the nail polish on the toothpick. The polish dries on the toothpick and you might find your dots getting significantly bigger *hint: look at the middle finger*
- Don’t get too eager and apply the top coat a couple of minutes after dotting the nails. Your dots might look like they are melting instead of a clean look


